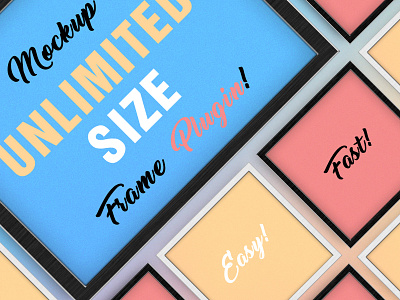
Frame Plugin Creator Mockup
Are you tired of searching the exact frame size for your projects? Your searching is OVER !!!
We present you our "Frame Plugin Creator Mockup" and it's really easy to use. Scroll down to see all the steps!
Frame Plugin Creator Mockup is to display your work and web project design in a best way.
The frames you create with the plugin are in high resolution or low resolution depends of your decision and each frame is ready to be used by simply Drag-n-Drop!
Check out our HUDE pack: https://crmrkt.com/5WQKx8
Th plugin will allow you to create your all frame size in less than a minute!
All items in this set will allow you to create combinations for the best result. With high resolution files you can zoom and crop compositions until you achieved the desired result.
It works via Smart Objects. So it is very easy in use. Just place your design into the Smart Object, and all changes will be reflected in a main psd file. For beginners we propose Help file with detailed instruction and tips.
All objects, shadows and lights are separated in flat and isometric view.
This mock-up is a great way to impress your clients and present your work in a professional way. We hope you’ll enjoy it.
Features
- Extended price $12
6 PSD files, BUT you can create unlimited frame sizes!!
9 Frame texture
Separated background
High resolution
Easy editable via Smart Objects
Organized layers
Separated shadow
Help file
Where can it be used?
School projects
Social Network
Print Projects
Architecture design
Blog
Advertisement
Website and much more...
How to use?
You must have Adobe Photoshop CS+ .
Open your Photoshop.
Open the "Main folder" and double lick on "The Frame plugin.atn". (to load the "Action panel" go "Window - Actions (or press alt + F9 on your keyboard))!
Before you click the "Play" button on the action decide what texture you will use for the frame!
if your texture is kinda dark you must select " DARK frame texture (If your texture is more to dark)"
If your texture is kinda bright you must select " BRIGHT frame texture (If your texture is more to bright)". Is that easy !!
After you click on "Play" button we messages will pop-up and you have to follow them. The messages will help you a lot :).
When the action is over you should see a message called "Ready"!
Now you have your own frame with your own frame size.
Click on "Double click to edit the frame" to open the smart object!
On the new window find and double click the layer called "The frame"
On the next new window find and double click the layer called "Place your image inside". Now you are able to place your work"
Save and close
They are few more setting that you can play with the frame itself.
If you need our help we will always be at your service !!
Please note: the interior in the previews are NOT included, but it's available here: https://crmrkt.com/vlq7kx
Please visit out shop for more isometric objects: https://creativemarket.com/IsometricWorld
Send us any questions at any time via e-mail: isometricworldesign@gmail.com
We’ll looking forward! Have fun and stay tuned!
FOLLOW FOR MORE PRODUCTS:
https://dribbble.com/IsometricWorld


