A FUZZY FUR EFFECT - Tutorial


Adobe Illustrator - Tips, Tricks, & Tutorials
📖 Read instructions below 👇Swipe to follow my step by step Adobe IllustratorTutorial ✨ and follow @the_graphics.studio for more!‼️
Let me know if you liked this tutorial in comments below ⬇️ 💬Creating a fuzzy fur effect in Adobe Illustrator is a fun and creative process. Here's a step-by-step breakdown:
1. Create a Perfect Circle: Start by using the Ellipse tool (Shortcut: L + Shift) to draw a perfect circle. Then, fill it with a Linear Gradient of your choice (Shortcut: G).
2. Duplicate the Circle: Select the circle and hold the Alt/Option key while clicking and dragging to create a copy. This will be used for blending.
3. Blend the Circles: Choose the Blend tool (Shortcut: W) from the toolbar. Click on one circle and then the other to create a blend between the two shapes.
4. Adjust Blend Options: Double-click the Blend tool in the toolbar to open the Blend tool options panel. Set the Spacing to "Specified Steps" and set the steps to 1000 for smoother blending.
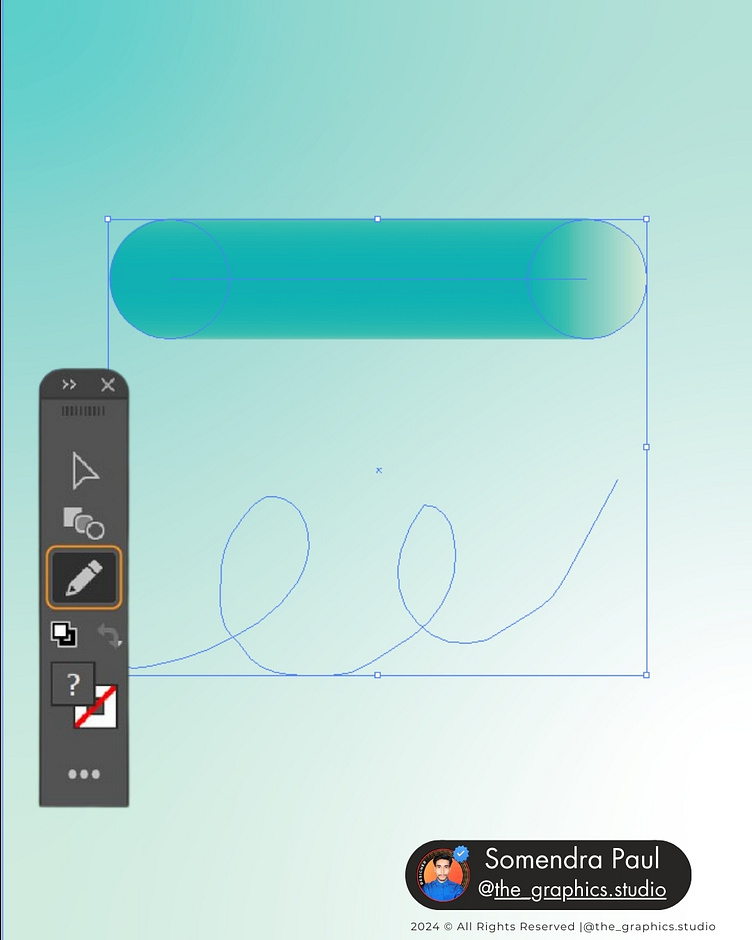
5. Create a Path: Select the Pencil tool (Shortcut: N) from the toolbar and draw a path. You can use any drawing tools to create the path you desire.
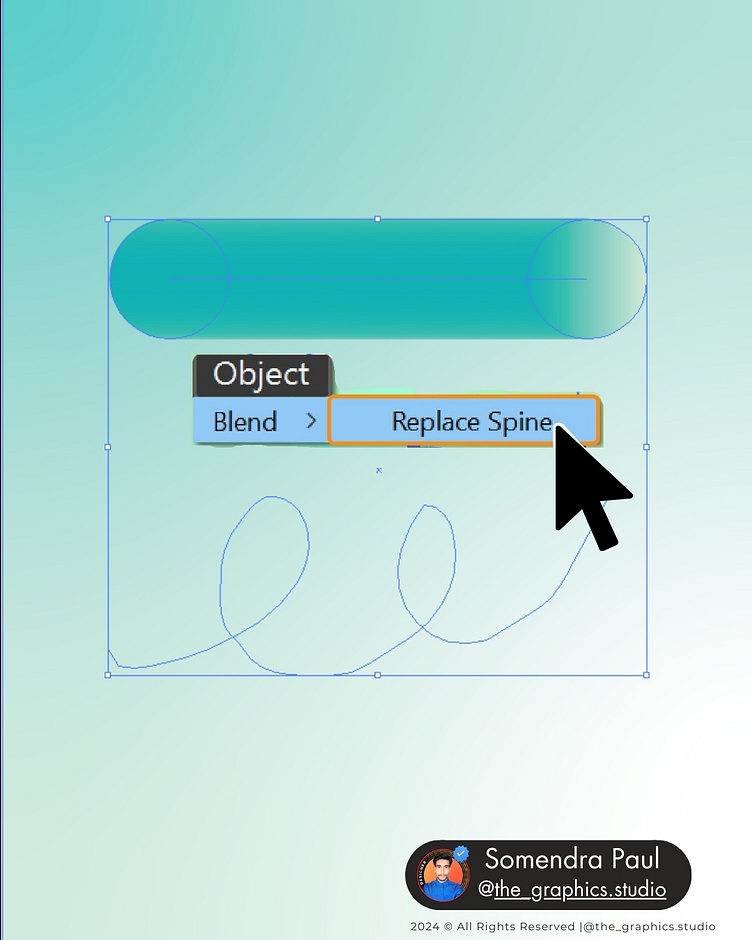
6. Replace Spine: Click and drag over the blended object and the path to select them both. Then, go to the top menu, choose Object > Blend > Replace Spine. Note: If you have multiple paths, you'll need to duplicate the blend for each path.
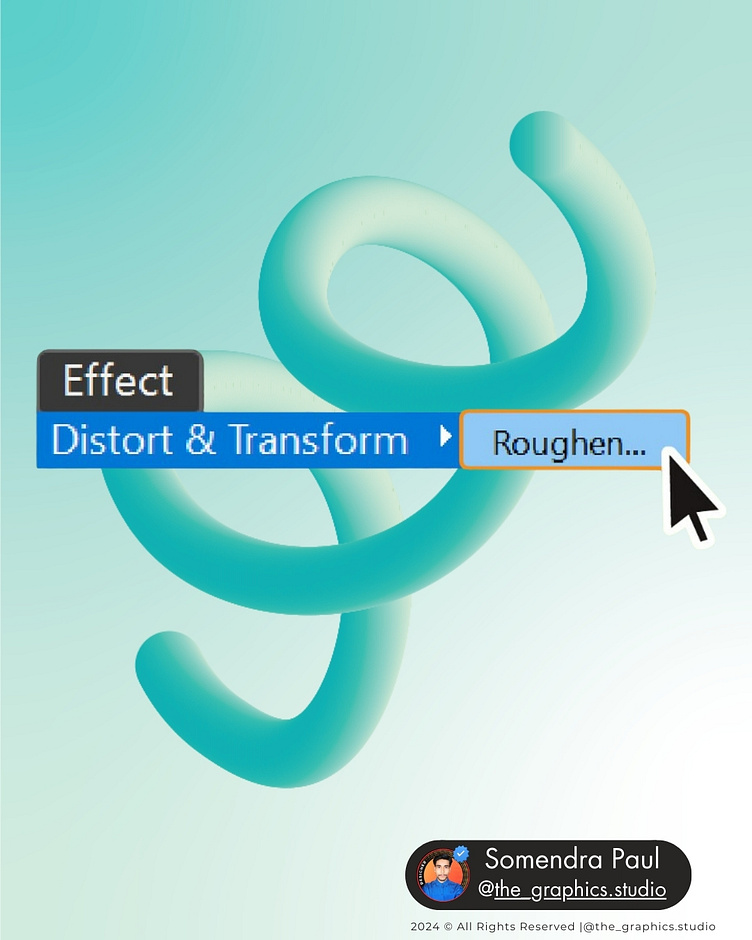
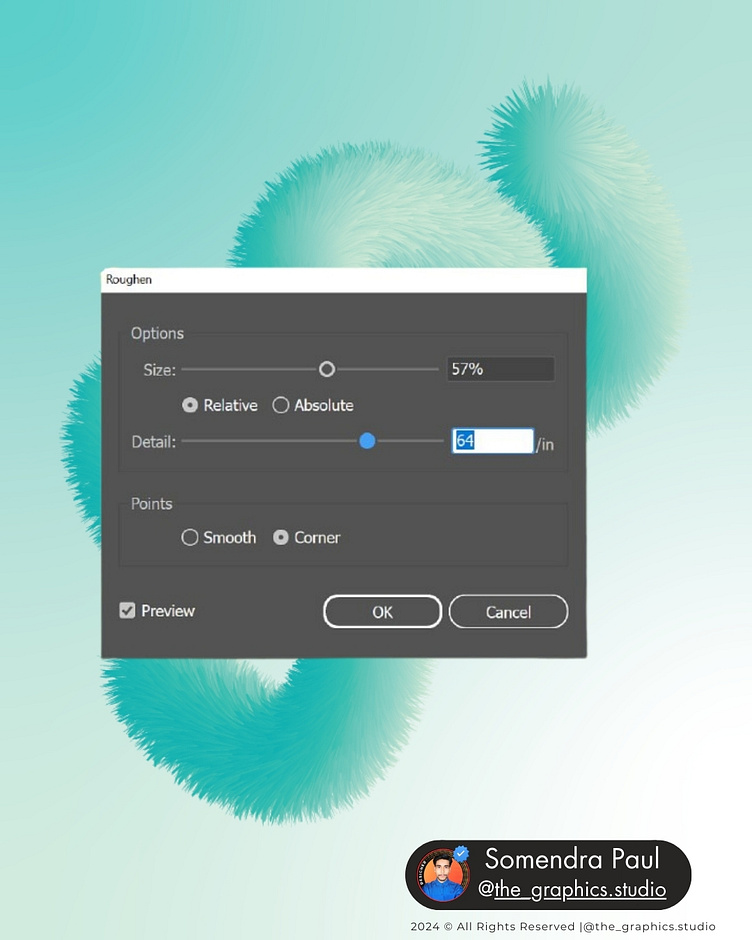
7. Apply Roughen Effect: With the path selected, go to the top menu and choose Effect > Distort & Transform > Roughen. Adjust the sliders in the Roughen effect panel to refine the size and details of the fur.
8. Finalize: Once you're satisfied with the fur effect, press OK in the Roughen effect panel.
Congratulations! You've successfully created a gorgeous fuzzy fur effect in Adobe Illustrator. Feel free to share your creations and let others know if you found this tutorial helpful.